Key Takeaways
- Put safety first when water is near electrical outlets, appliances, cords, or the electrical panel.
- Stop the water source when it is safe to do so.
- Photograph damage before moving belongings or beginning cleanup.
- Remove small amounts of clean standing water safely, then start drying affected materials.
- Wet materials should be dried promptly because moisture can support mold growth.
- Floodwater, sewage backups, hidden moisture, and major structural damage usually require trained help.
Water damage can disrupt a Kansas City, Missouri home quickly, whether it starts with a burst pipe during a cold snap, a failed appliance hose, a leaking roof, or water entering a basement. The first day is not about completing every repair. It is about protecting everyone in the home, stopping additional water intrusion, documenting the loss, and beginning safe drying.
Homeowners dealing with a serious leak or widespread moisture can review https://frontierrestorationkc.com/services/water-restoration/ while taking immediate steps to stabilize the affected area. A calm, organized response can help limit damage to flooring, drywall, furniture, and personal belongings.
Why the First Day Matters
Water does not stay where it first appears. It can travel beneath flooring, wick into drywall, soak insulation, enter cabinets, and collect beneath carpet padding. A floor may look dry at the surface while moisture remains below it. Delays can contribute to staining, swelling, odors, material deterioration, and microbial growth.
The U.S. Environmental Protection Agency advises homeowners to dry water-damaged areas and items within 24 to 48 hours to help prevent mold growth. That window is a practical target, not a guarantee, because temperature, humidity, material type, and the source of the water all affect how quickly a home dries.
Step 1: Check for Immediate Safety Hazards
Keep children and pets away from the affected area. Do not enter standing water if it has reached outlets, appliances, cords, or exposed wiring. If it is safe to access the electrical panel without approaching water, turn off power to the affected area. Otherwise, leave it alone and contact a qualified electrician or emergency professional.
Look upward and around the room before starting cleanup. Sagging ceilings, loose plaster, buckled floors, cracked finishes, and visibly shifting walls can indicate a structural hazard. Do not walk beneath a bulging or sagging ceiling, and do not cut, puncture, or pull down saturated ceiling material.
Step 2: Stop the Water Source
For a plumbing leak, close the shutoff valve serving the fixture if it is accessible and safe. If the leak cannot be isolated, turn off the home’s main water supply. For a washing machine, refrigerator, or dishwasher leak, turn off the appliance water supply if you can reach it without walking through water.
During roof leaks or storm intrusion, focus on containing water from inside. Place buckets beneath active drips and move belongings away from the area. Do not climb onto a roof during rain, wind, lightning, or icy conditions, and do not enter an unstable attic or ceiling area.
Step 3: Document Everything Before Cleanup
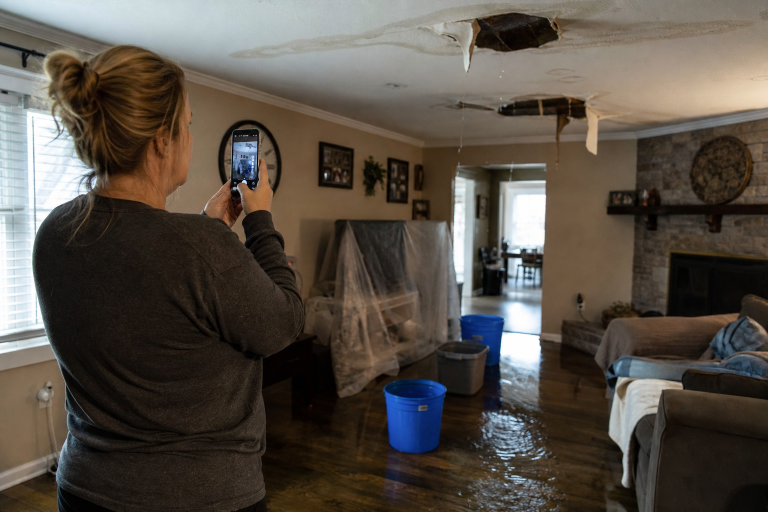
Take wide photos and video of every affected room before moving items. Then capture close-ups of damaged walls, ceilings, flooring, furniture, appliances, and personal property. Photograph the suspected source when it can be done safely, and write down when the damage was discovered, when the water was stopped, and the steps taken afterward.
Contact your insurance company promptly and ask about reporting requirements, coverage questions, deductibles, and next steps. Keep receipts for emergency supplies, temporary repairs, professional services, and lodging if displacement becomes necessary. Avoid permanent repairs before the loss has been documented, unless immediate work is needed to prevent further damage or address a safety risk.
Step 4: Protect Valuable Belongings
- Move documents, photographs, medications, electronics, and small valuables to a dry location.
- Lift furniture legs with plastic blocks or aluminum foil when doing so does not create an injury risk.
- Remove rugs from wet flooring if they can be handled safely.
- Do not drag heavy furniture through standing water, especially if the water source is unknown.
Step 5: Begin Safe Water Removal
For a small amount of clean water, towels, mops, and a properly rated wet-dry vacuum may help remove water after electrical hazards have been addressed. Never use an ordinary household vacuum to collect water. It is not designed for wet pickup and can create an electrical danger.
Do not attempt to clean up sewage, water from a drain backup, or outdoor floodwater without appropriate protective measures and equipment. Those sources may contain contaminants. Large losses, water in multiple rooms, and water that has entered walls or flooring often need commercial extraction and drying equipment.
Step 6: Start the Drying Process
Once standing water is removed and the area is safe, improve airflow with fans, dehumidifiers, and open windows when outdoor conditions allow. Fans should not be used where they could spread contaminated water or visible mold. Surface dryness alone is not enough, since moisture may remain behind baseboards, under flooring, inside cabinets, or within wall cavities.
Check These Often-Missed Areas
- Behind baseboards and along floor edges
- Under the carpet and padding
- Below are sinks and appliances
- Inside cabinets and vanities
- Behind drywall and around ceiling leaks
- Basements, crawl spaces, utility rooms, and HVAC areas
When to Call a Water Damage Professional
Professional help is appropriate when water comes from sewage, a drain, or flooding; when standing water affects a large area or multiple rooms; when ceilings, walls, subfloors, insulation, or HVAC components are wet; or when the moisture source is unknown. A musty odor, visible mold, electrical concerns, or structural damage are also reasons to arrange a qualified inspection.
What Not to Do During the First 24 Hours
- Do not walk through standing water near electrical equipment.
- Do not use extension cords or standard vacuums in wet areas.
- Do not puncture or cut into a sagging ceiling.
- Do not mix bleach with ammonia or other cleaning products.
- Do not paint over stains or mold before correcting the moisture problem.
- Do not discard damaged belongings before photographing them, unless they pose a health or safety concern.
A Simple First-Day Timeline
- First 15 minutes: Move people and pets away, assess hazards, and stop the water if possible.
- Within the first hour: Document the damage and contact your insurer or an appropriate professional.
- Over the next few hours: Protect valuables, remove safe-to-handle water, and begin controlled drying.
- Before the day ends: Inspect hidden areas, save receipts, and list damaged belongings.
Common Questions Homeowners Ask
Can Carpet or Hardwood Be Saved?
It depends on the water source, saturation level, time wet, and whether moisture reached the subfloor. Clean-water losses addressed quickly may allow some materials to be dried, while contaminated, swollen, or heavily saturated materials may need replacement.
Is a Musty Smell a Sign of Hidden Moisture?
It can be. Odors may point to damp materials beneath flooring, behind walls, or inside cabinetry. A visual check may not reveal the full extent of moisture.
Conclusion
For Kansas City homeowners, the first 24 hours after water damage should follow a simple order: protect people, stop the source, document the loss, protect belongings, remove water safely, and make sure the structure is drying. Acting carefully and promptly can help keep a manageable water incident from becoming a much larger repair.