
Key Takeaways
- Fix important repairs before listing.
- Clean, declutter, and organize every room.
- Improve curb appeal with simple updates.
- Gather property documents and renovation records.
- Set a realistic price based on comparable sales.
- Follow a preparation timeline to avoid last-minute stress.
- Focus on making the home clean, appealing, and ready for buyers.
Selling a home in Mississauga or the wider Greater Toronto Area starts well before photography, showings, and a listing date. Buyers can quickly compare condition, layout, location, and value, so homes that feel cared for and are accurately positioned are often easier to understand on first viewing online.
For homeowners seeking local guidance, Mississauga real estate agent Sam McDadi leads Sam McDadi Real Estate Brokerage, a GTA firm offering home evaluations, property marketing, buying and selling support, and neighborhood guidance across Mississauga and surrounding communities. Its seller-focused services, including preparation, staging, inspection coordination, and photo and video production, make it a valuable resource for determining what needs attention before a home goes live.
Why Preparation Matters in the 2026 GTA Market
Broad market headlines are useful context, but they cannot price a specific home on a specific street. A condominium near Square One, a family home in Erin Mills, and a lakefront property in Port Credit can attract different buyer groups and face different competition. Still, current conditions reward clarity. GTA market reports show that buyers have meaningful inventory to consider, which makes presentation, maintenance, and evidence-based pricing especially important.
A buyer may forgive an older kitchen if the home is clean, functional, and priced accordingly. Conversely, visible neglect can create questions about larger issues that are not immediately apparent. Preparation is not about making every property look newly built. It is about reducing uncertainty.
Step One: Set a Preparation Budget
Set a maximum budget before booking contractors or shopping for finishes. Start by separating essential work from optional improvements. Essential costs may include repairs, cleaning, storage, landscaping, staging, photography, and moving-related expenses. Optional work may include new counters, flooring, or a larger renovation.
More spending does not automatically produce better sales results. Use the budget to solve the problems buyers will notice, not to add highly personal upgrades that may not suit the next owner.
Step Two: Fix Problems That Create Buyer Doubt
Address issues that affect safety, function, water management, or confidence in the home’s upkeep. Look for water stains, active leaks, loose railings, damaged flooring, broken fixtures, sticking doors, and burned-out bulbs. Test lights, plumbing fixtures, appliances that will remain, heating and cooling, and garage door operation, where applicable.
Consider the age and visible condition of major components such as the roof, windows, furnace, air conditioner, plumbing, and electrical system. Keep invoices, warranties, permits, and renovation records together. Clear documentation cannot eliminate every buyer question, but it helps provide a more complete picture.
Step Three: Choose Improvements by Priority
- Handle high-priority work first. Correct safety issues, water intrusion, major defects, and non-functioning systems.
- Invest in presentation next. Deep cleaning, neutral paint touch-ups, fresh caulking, practical lighting, and basic landscaping can make the home feel more cared for.
- Assess larger updates case by case. Flooring, bathroom refreshes, kitchen changes, and basement work should be evaluated against comparable local properties and the time available.
- Be cautious with personal or luxury choices. Specialty finishes and major renovations may not align with buyer preferences or yield a proportional return.
Step Four: Make Each Room Easy to Picture
Buyers should be able to identify each room’s purpose without having to guess. Remove excess furniture, pack personal collections, and clear countertops. Closets, cupboards, and storage areas should be organized because buyers often look inside them to assess daily usability.
Use consistent lighting where possible, open blinds for daytime photography, and give awkward rooms a clear function. A spare room can read as an office, nursery, or guest room more effectively when it is not being used as overflow storage.
Step Five: Improve the First Impression
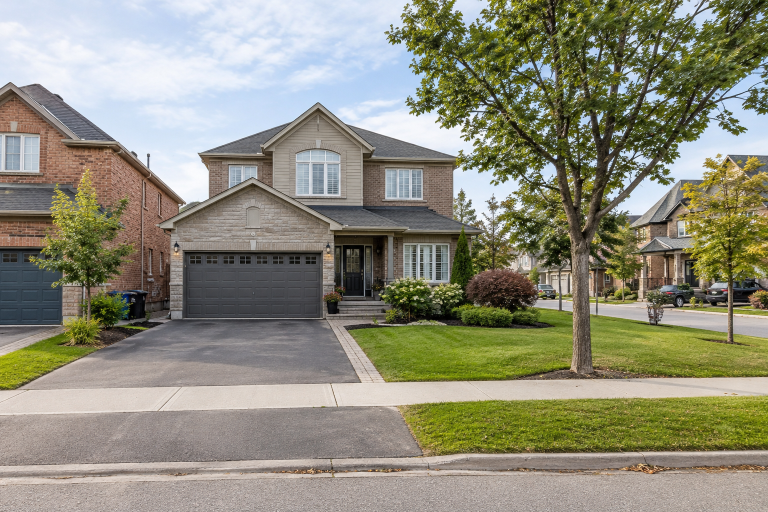
In Mississauga, curb appeal begins at the sidewalk, driveway, or condominium entrance. Wash the front door, windows, siding, garage door, and exterior lights. Trim overgrown plants, remove dead branches, clear walkways, and repair loose steps or damaged handrails. Replace worn house numbers or dated hardware if they distract from an otherwise tidy entry.
The goal is simple: the approach to the property should reinforce the care visible inside.
Step Six: Prepare Paperwork Before Listing
Gather property tax information, utility details, surveys, permits, invoices, warranties, and records for completed work. Confirm room measurements, parking details, inclusions, rental equipment, and any statements about legal use before they appear in marketing materials.
Condominium sellers should request a status certificate early. The information included in a status certificate can cover the unit’s and the condominium corporation’s finances, insurance, governing documents, and other details for buyers to review. Starting early helps avoid a rushed document process.
Step Seven: Build a Pricing Plan from Evidence
Use recently sold homes as the foundation for pricing, then compare location, property type, size, lot, layout, condition, parking, and upgrades. Active listings show the alternatives a buyer sees today, but completed sales better indicate what buyers have recently agreed to pay.
Also consider how long comparable homes took to sell, whether they were re-priced, and how closely they resemble the subject property. A high asking price without a clear reason can reduce early interest, while an informed launch price gives buyers a clearer reason to book a showing.
A Simple 30-Day Preparation Timeline
Four Weeks Before Listing
- Set the budget and target listing date.
- Complete priority repairs and request contractor quotes.
- Gather documents and verify property details.
Two Weeks Before Listing
- Declutter, pack excess belongings, and organize storage.
- Finish paint touch-ups, cleaning, and exterior work.
- Book staging, photography, floor plans, and cleaning.
One Week Before Listing and Launch Day
- Remove valuables, sensitive papers, and unnecessary personal items.
- Confirm the price, inclusions, showing instructions, and listing details.
- On launch day, open blinds, turn on lights, keep rooms comfortable, and arrange for pets to be away when possible.
Common Mistakes to Avoid
- Starting a large renovation before reviewing nearby comparable homes.
- Using the renovation budget as the basis for the asking price.
- Ignoring odors, poor lighting, clutter, and small maintenance issues.
- Leaving too many personal items visible in listing photos.
- Waiting until the final days to request key documents.
Frequently Asked Questions
How much should a seller spend before listing?
Start with safety, maintenance, cleanliness, and presentation. The right amount depends on the home’s condition, price range, and nearby competition.
Should every room be staged?
No. Focus on rooms that help buyers understand the layout. Empty, awkward, or multipurpose spaces often benefit most from simple furniture placement.
Is a pre-listing inspection worth it?
It can help identify issues early, particularly in older or more complex homes, but it is not necessary in every situation. Consider the property’s age, condition, and likely buyer concerns.
Conclusion
A successful Mississauga listing does not require a perfect home or an expensive overhaul. It requires a clear plan that prioritizes condition, presentation, paperwork, and pricing evidence. By beginning early and addressing the details that create buyer confidence, sellers can reduce avoidable surprises and present their property with purpose.